Building a contact form with AWS API Gateway, Lambda, and SNS
Currently, MyWebsite is hosted on Cloudflare's Pages service, which allows for easy creation and publishing of websites. However, this service does not allow for backend code execution, so only static websites can be published. One of the needs I currently have is to develop a contact form for visitors to easily contact me through my website. The form itself can be created with HTML and CSS, but to implement a message processing logic I need to execute code on the backend. Instead of moving the website to a different host, we will take advantage of the tools provided by AWS to implement a serverless backend that handles this logic.

Amazon Simple Notification Service (SNS)
Amazon Simple Notification Service (SNS) is an Amazon Web Services (AWS) service that allows developers to send notifications through multiple protocols such as HTTP/S, email, and SMS, which enables developers to create scalable and highly available notification systems.
The purpose of the form is that when someone fills it out and submits it, I receive an email at my personal email address with the form data. When I began looking for a service that would allow me to send emails from the backend, I discovered Amazon Simple Email Service (SES), a scalable and secure email sending service that allows for sending bulk, personalized, and transactional emails. I considered using this service, but in the end, it felt like using a sledgehammer to crack a nut, I did not need bulk email sending capabilities, I just needed a notification via email when the form was submitted. That is when I found Amazon SNS, a much simpler solution for the implementation I needed.
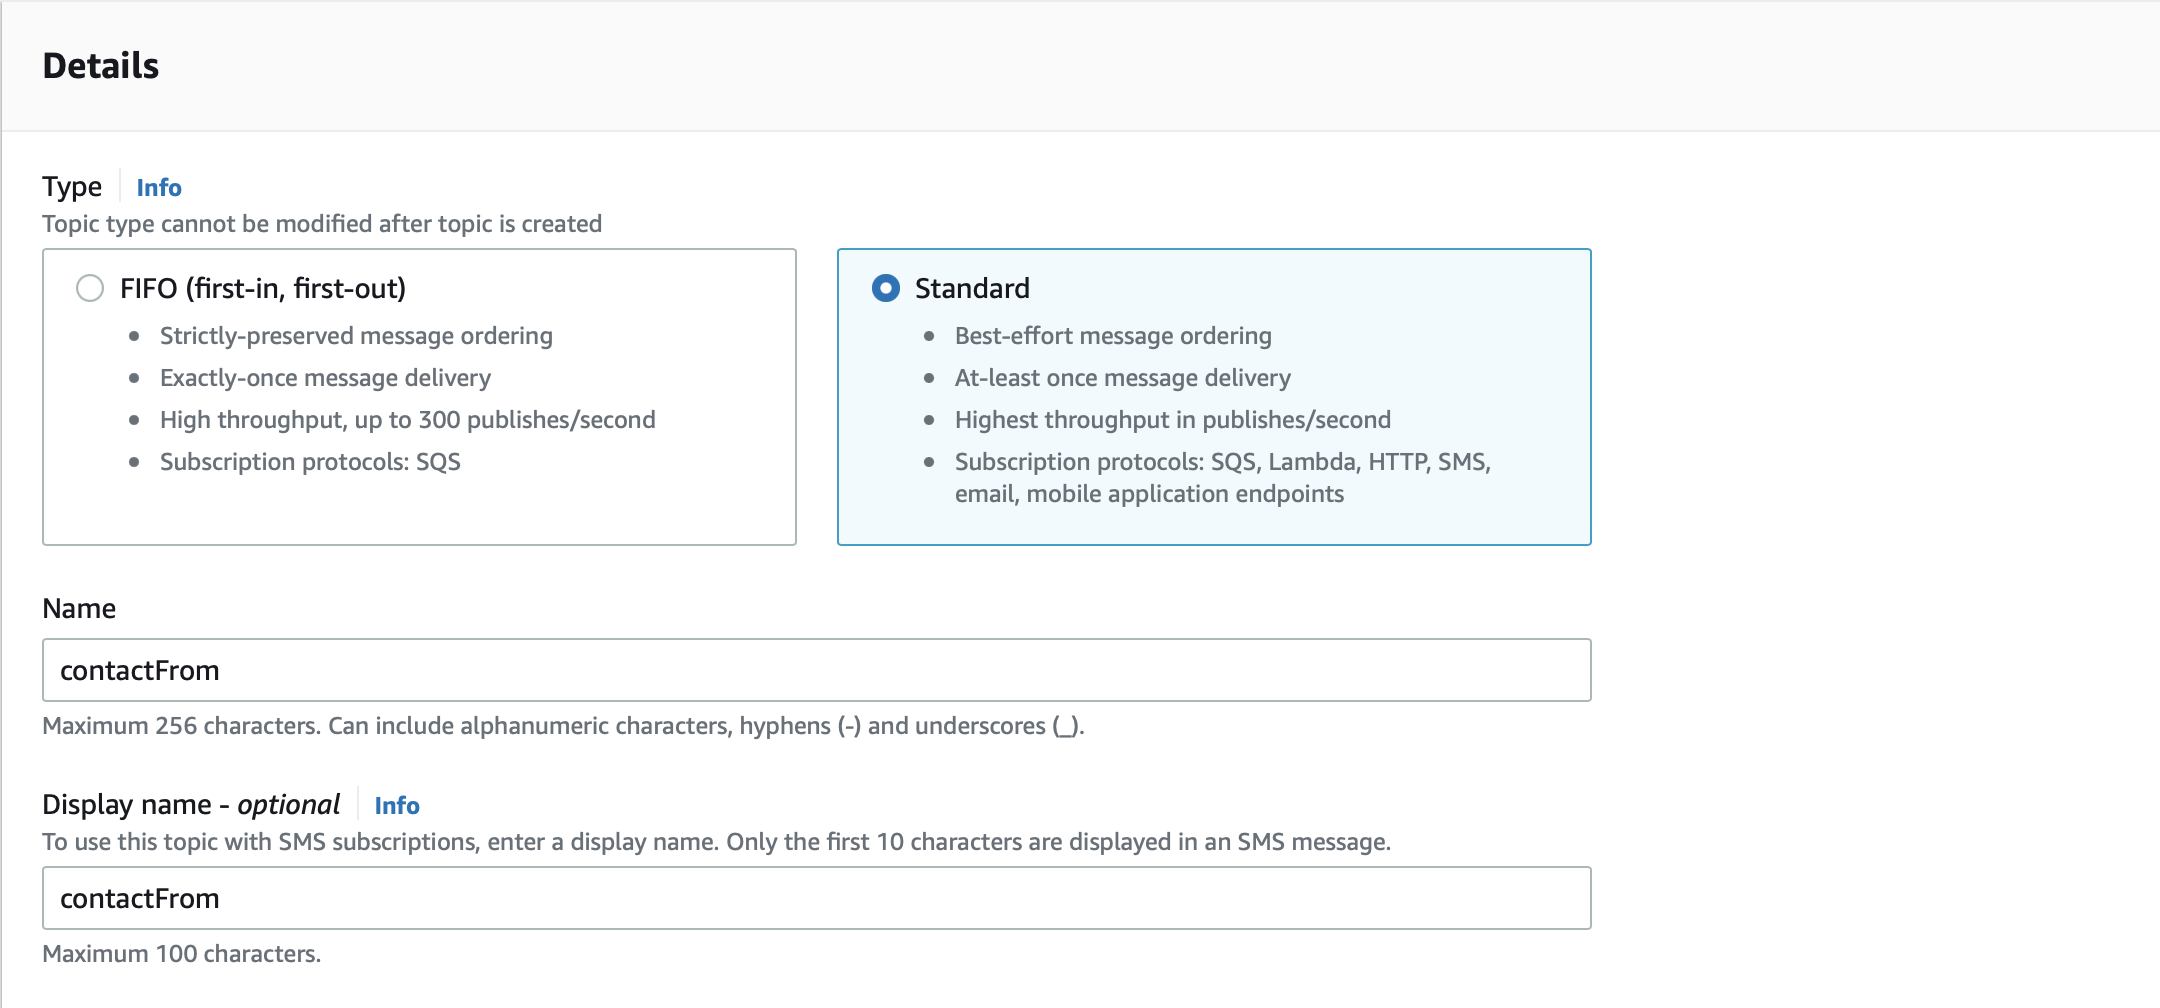
The first step I had to take was to create a new standard SNS topic and give it a name, the rest of the configuration parameters were left at default.
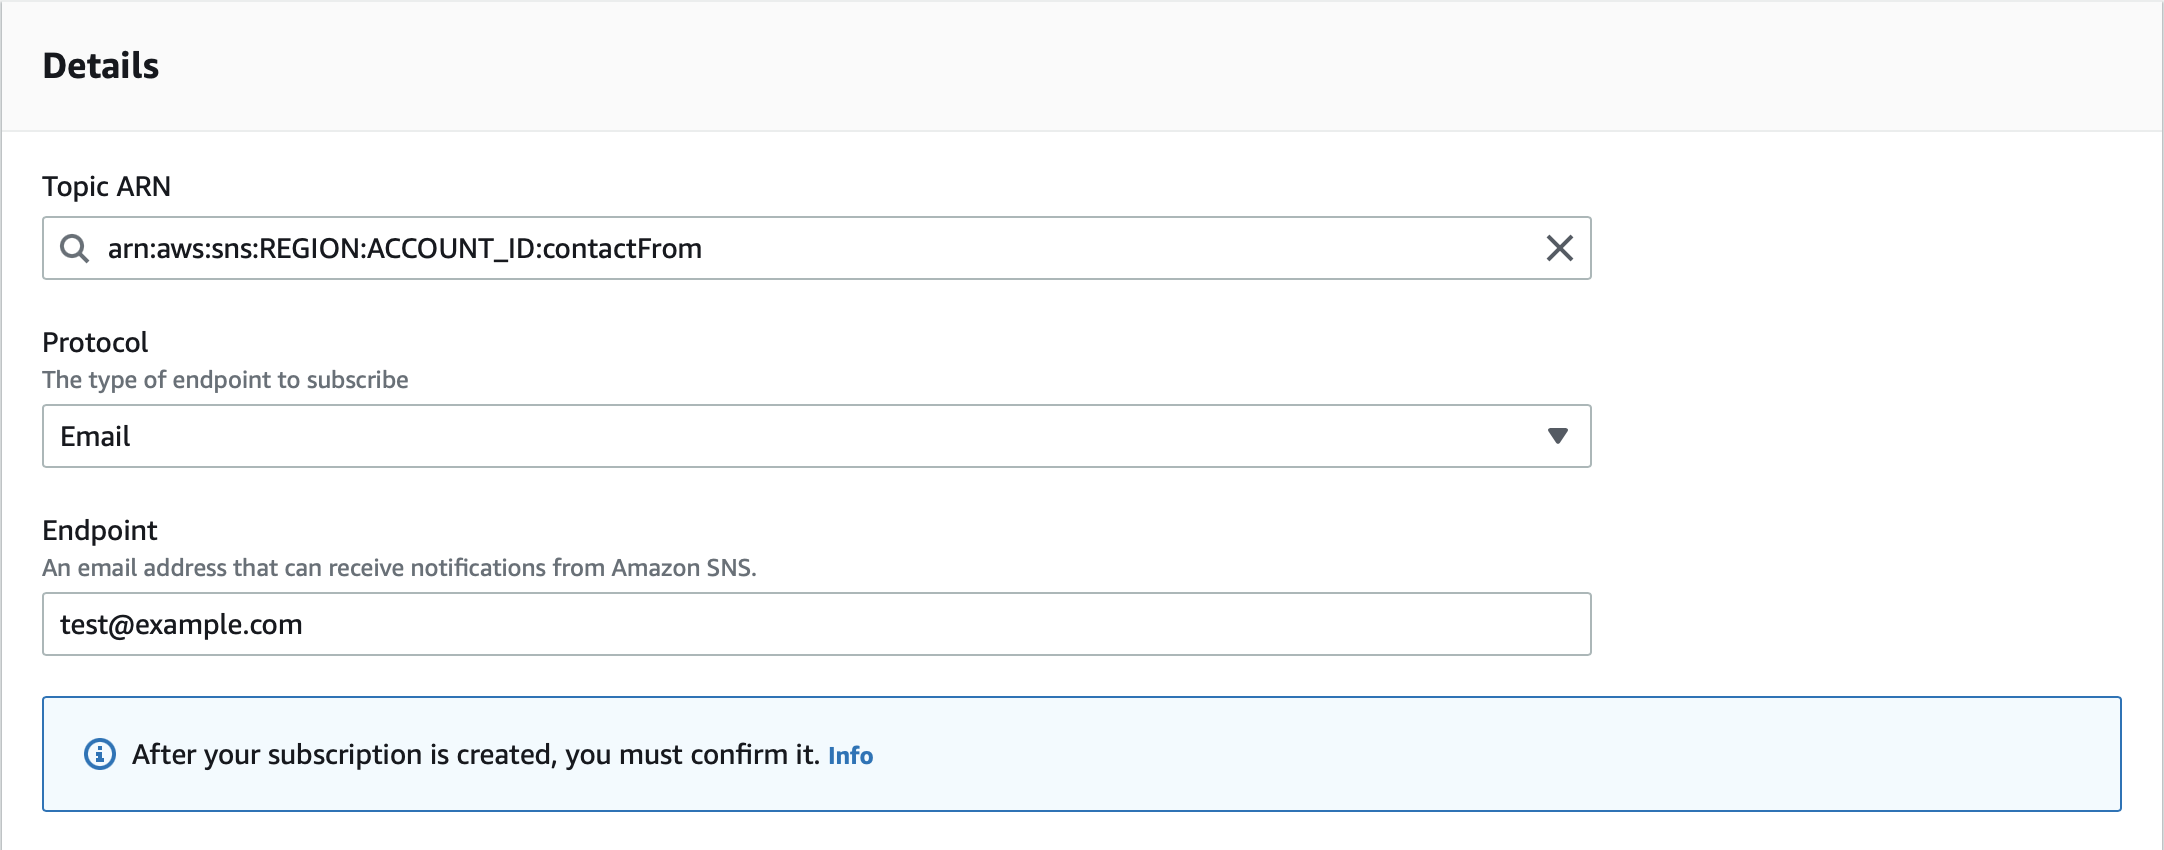
The second step is to create a subscription to the SNS topic we just created by choosing email as the protocol and adding an email address. Once created, AWS will send an email to the specified email address with a link to confirm the subscription. Once confirmed, any messages published to the SNS topic will be delivered to the email address.
AWS Secrets Manager
AWS Secrets Manager is a service offered by AWS that allows users to securely store, manage, and rotate sensitive information, such as database credentials and API keys. The service provides a centralized location for storing and managing secrets, which helps to improve security and compliance by reducing the need to hardcode secrets into applications or share them through other means.
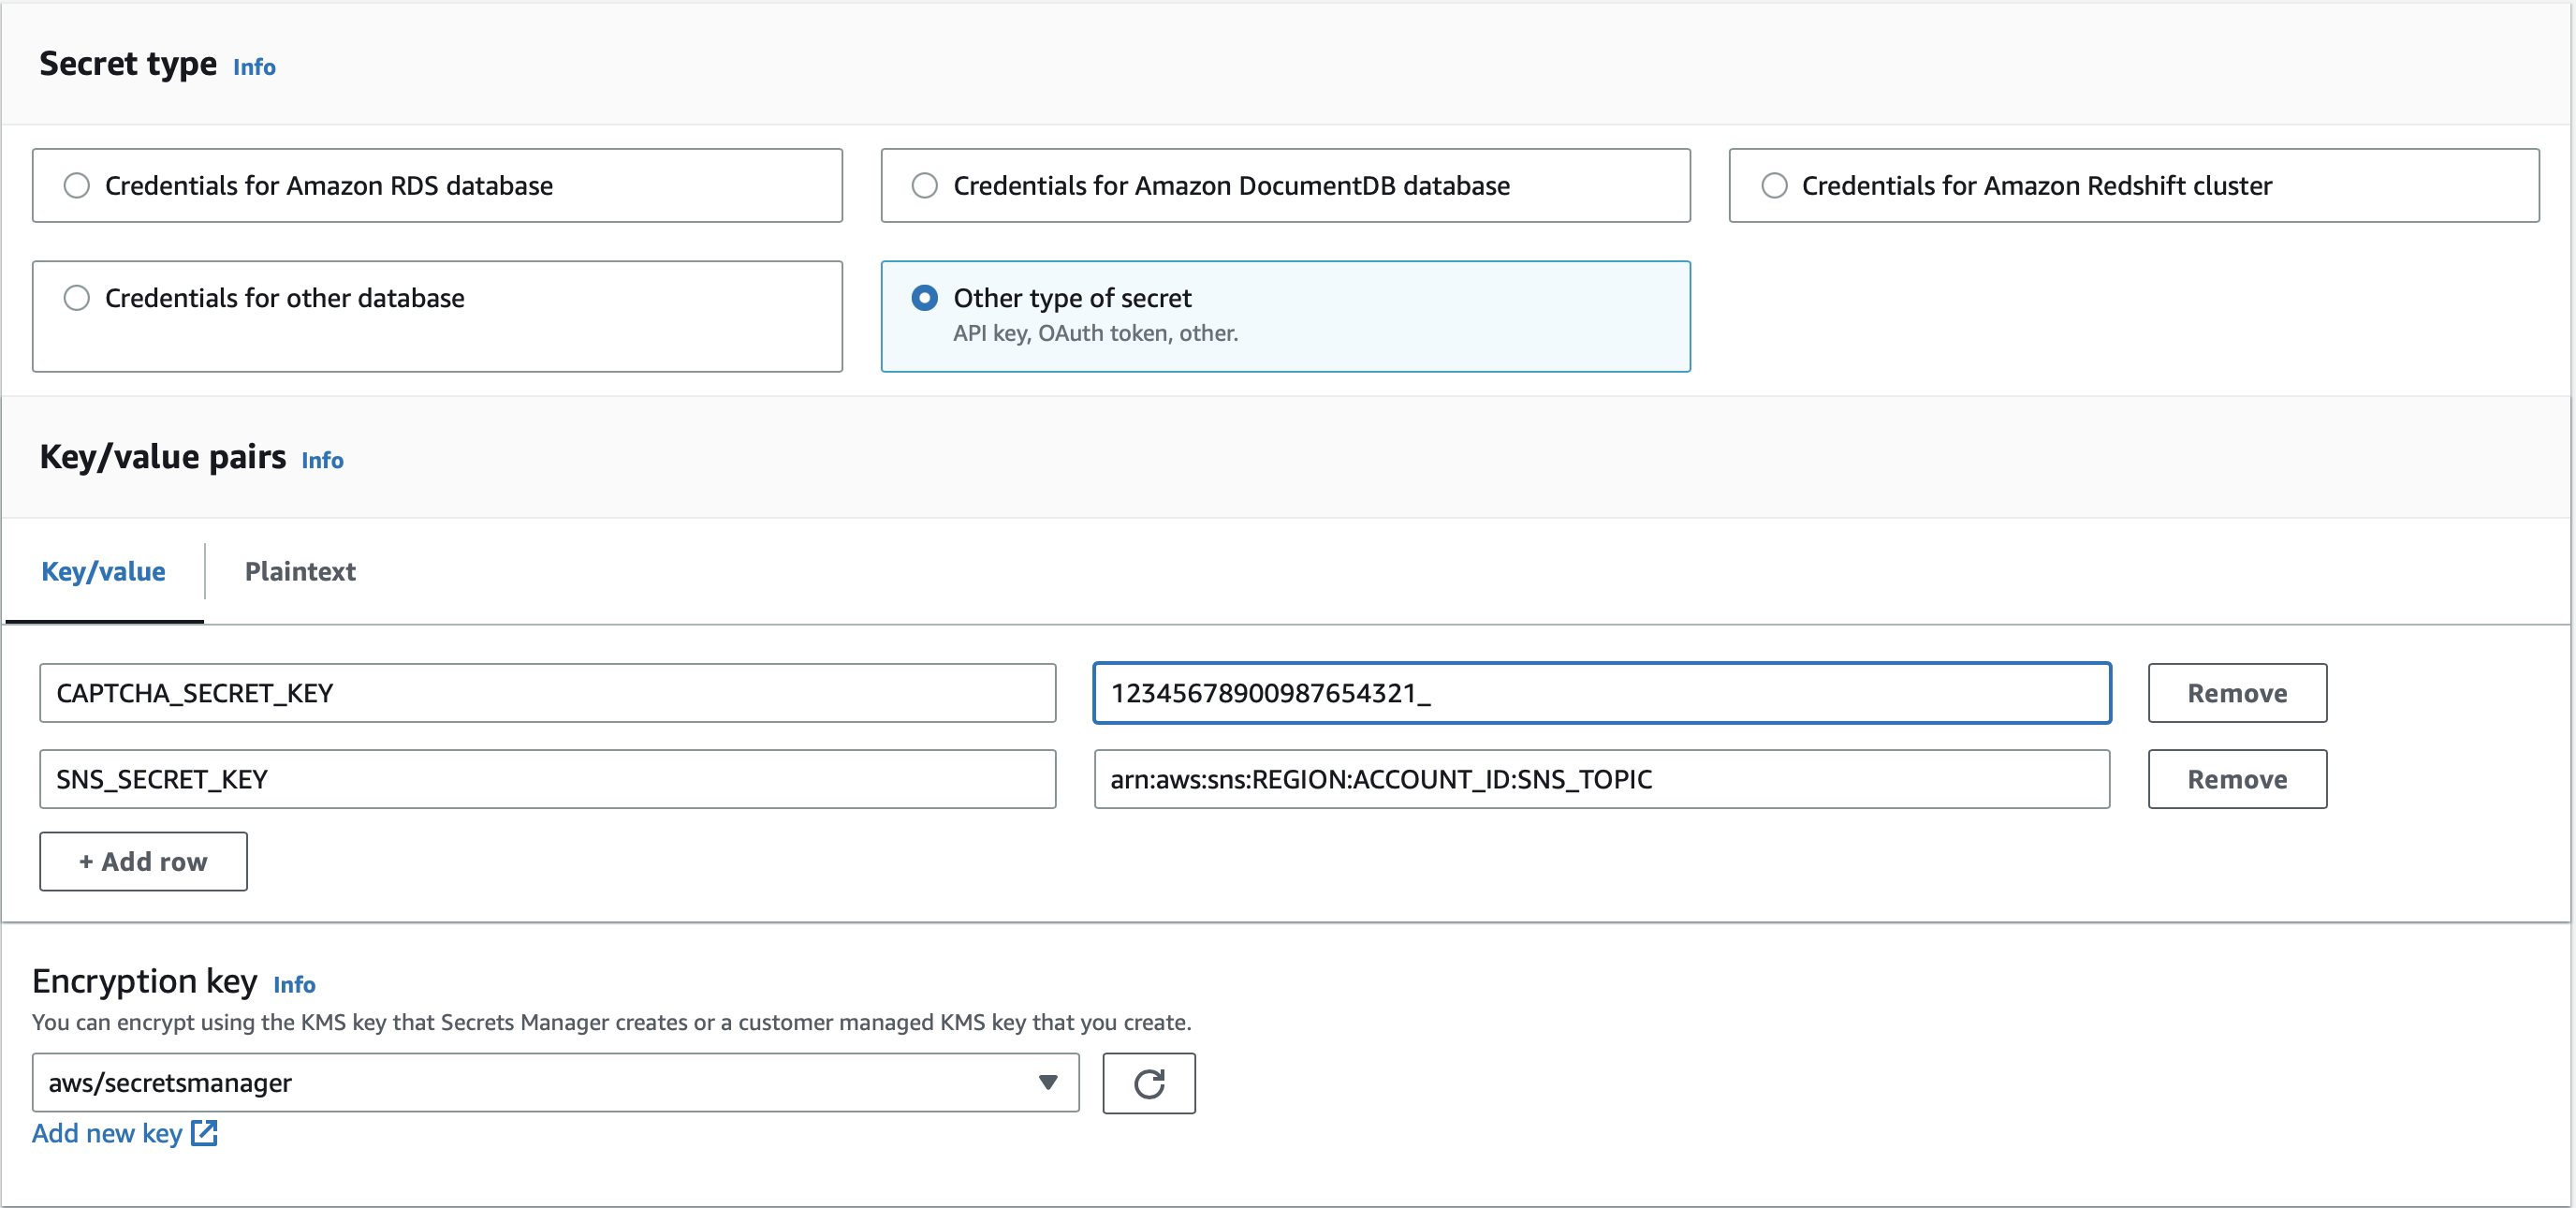
Secrets Manager is utilized to securely store the private key for reCaptcha and the ARN identifier for the SNS topic. This prevents the need to include the sensitive information in plain text within the source code of the Lambda function. Instead, during initialization of the function, the data is accessed and assigned to global variables within the code. This allows for them to be utilized by the Lambda function handler every time the function is invoked, while also maintaining a higher level of security by not having the sensitive information included in the source code.
const init = async () => {
    const secretsManager = new SecretsManager({region: REGION});
    try {
        const secret = await secretsManager.getSecretValue({ SecretId: 'SECRET_ID' }).promise();
        const secrets = JSON.parse(secret.SecretString);
        CAPTCHA_KEY = secrets.CAPTCHA_SECRET_KEY;
        SNS_ARN = secrets.SNS_SECRET_KEY;
    } catch (error) {console.log(error);}
};
Google reCAPTCHA
When the front end of your application needs to perform a task that can only be carried out by the backend, it is necessary to make a call to the backend, passing it the necessary information to perform the task. In this case, our backend is an API that is accessed through an HTTPS request made from the client's browser. The URL to which this request must be made is public, as it must be written in plain text in the JavaScript source code. However, this means that anyone who has access to the source code and has malicious intentions could start sending unwanted requests to our backend. It is important to be aware of this and take appropriate security measures to protect the backend from potential attacks.
One of the security measures that can be implemented is CORS (Cross-Origin Resource Sharing), a security mechanism that is used to restrict access to resources on one domain from a different domain. This means that a webpage running on one domain can make HTTP requests to a server on another domain, as long as that server has previously authorized such requests. CORS is a security measure that is used to prevent "cross-site request forgery" attacks (CSRF).
Additional measures must be taken to ensure that requests made through the contact form on our website are legitimate. One option is to use a third-party service like reCAPTCHA. reCAPTCHA is a Google service that protects websites from spam and automated abuse, and is commonly used in contact forms.
// Front-end side
form.addEventListener('submit', (e) => {
    e.preventDefault();
    const token = grecaptcha.getResponse();
    if (token.length === 0) {
        // The captcha has not been completed
    } else{
        // Call the backend passing the token
    }
});
When a user submits the contact form, reCAPTCHA uses a challenge system to determine the legitimacy of the request.It presents the user with a challenge, such as a puzzle or image selection task, to confirm that the request is being made by a human and not a bot. To validate from our backend that the API request is valid, reCAPTCHA uses a system of public and private keys. The public key is used to encrypt the information sent from the contact form to the server and is sent along with the public key via an HTTP request. Our backend uses the private key to decrypt the encrypted information and validate the request. If the request is legitimate, we will continue with the execution of the API, otherwise we will reject the request.
// Back-end side
const response = await fetch('https://www.google.com/recaptcha/api/siteverify', {
    method: 'POST',
    body: 'secret=' + CAPTCHA_KEY + '&response=' + token,
    headers: {
        "Content-Type": "application/x-www-form-urlencoded"
    }
});
AWS Lambda
AWS Lambda is a serverless compute service provided by AWS. It allows developers to run their code without having to provision or manage servers. With Lambda, you can build and run applications and services without having to think about infrastructure. You can create a Lambda function, and AWS will automatically scale it based on the incoming request rate, and it will also handle the patching and maintaining of the underlying servers.
IAM Policy
An Identity Access Management (IAM) role is required to grant the necessary permissions to publish the message to the SNS topic, to obtain the secrets from Secrets Manager, and to write logs in Amazon CloudWatch. Adhering to the principle of least privilege, the following IAM policy will be assigned to the role.
{
    "Version": "2012-10-17",
    "Statement": [
        {
            "Effect": "Allow",
            "Action": ["logs:CreateLogStream", "logs:PutLogEvents", "logs:CreateLogGroup"],
            "Resource": "arn:aws:logs:REGION:ACCOUNT_ID:*"
        },
        {
            "Effect": "Allow",
            "Action": "secretsmanager:GetSecretValue",
            "Resource": "arn:aws:secretsmanager:REGION:ACCOUNT_ID:secret:SECRET_NAME"
        },
        {
            "Effect": "Allow",
            "Action": "sns:Publish",
            "Resource": "arn:aws:sns:REGION:ACCOUNT_ID:SNS_TOPIC"
        }
    ]
}
Possible answers from the function
In order to keep track of what happens within our Lambda function during its execution, a series of possible responses have been created that the Lambda function returns. Each of these responses consists of a server response code and a response body indicating whether the task was successfully completed or if there was an error, in which case a code and message describing the problem is attached. The following are the possible responses:
| Code | Status Code | Message |
|---|---|---|
| SECRET_RETRIEVAL_ERROR | 500 | Error retrieving secrets from Secrets Manager |
| RECAPTCHA_CONNECTION_ERROR | 500 | Could not connect to reCAPTCHA server |
| RECAPTCHA_VERIFY_ERROR | 500 | reCAPTCHA verify returned false |
| SNS_PUBLISH_ERROR | 500 | Could not send the message to SNS topic |
| JSON_PARSE_ERROR | 400 | Invalid HTTPS body |
| MISSING_INPUT_ERROR | 400 | Not all fields requiered |
| VERIFY_INPUT_ERROR | 400 | Invalid inputs |
| FORM_SUBMITTED_SUCCESSFULLY | 200 | Form submitted successfully |
Validates and sanitizes the Lambda inputs
"validateInput" is used to ensure the input provided to the Lambda function is valid and safe to use. It first checks if all the necessary fields have been provided. Next checks if the email provided has a valid format, if the subject and message has a valid size. If any of these checks fail, it returns "false". Finally, it sanitizes the input to remove any potential malicious code and returns the cleaned input.
const validateInput = (input) => {
    const REQUIRED_INPUTS = ['mail', 'subject', 'message', 'token'];
    for (let i = 0; i < REQUIRED_INPUTS.length; i++) {if (!input[REQUIRED_INPUTS[i]]) {return false;}}
    const MAIL_REGEX = /^(([^<>()\[\]\\.,;:\s@"]+(\.[^<>()\[\]\\.,;:\s@"]+)*)|(".+"))@((\[[0-9]{1,3}\.[0-9]{1,3}\.[0-9]{1,3}\.[0-9]{1,3}\])|(([a-zA-Z\-0-9]+\.)+[a-zA-Z]{2,}))$/;
    if (!MAIL_REGEX.test(input.mail)) {return false;}
    if (input.subject.length < 4 || input.subject.length > 100 || input.message.length < 20 || input.message.length > 1000) {return false;}
    input.mail = input.mail.trim().replace(//g, ">");
    input.subject = input.subject.trim().replace(//g, ">");
    input.message = input.message.trim().replace(//g, ">");
    return input;
};
Publishes a message to a specified SNS topic
"publishMessageToSNS" uses the AWS SDK to create an instance of the SNS client, and then constructs the message to be published. The function then prepares the necessary parameters for the SNS publish method, including the subject of the message, the message itself, and the ARN of the SNS topic. The function then uses the SNS client to publish the message to the specified topic. If the message is successfully published, the function resolves the promise and returns the response. If there is an error and the message could not be published, the function rejects the promise and throws an error.
const publishMessageToSNS = async (mail, subject, message) => {
    try {
        const sns = new SNS({region: REGION});
        const snsMessage = {mail: mail, subject: subject, message: message};
        const snsParams = {Subject: '[CONTACT_FORM]', Message: JSON.stringify(snsMessage), TopicArn: SNS_ARN};
        const response = await sns.publish(snsParams).promise();
        return response;
    } catch (error) {throw new Error(error);}
};
Lambda handler
A "handler" function is the main entry point for a Lambda function and is responsible for handling the specific event that triggers the function. It defines the logic of the function and processes the input event. Once the event is processed, the handler returns a response or an error.
This handler checks that the global variables CAPTCHA_KEY and SNS_ARN have been initialized with the values obtained from the Secrets Manager. Then, it retrieves the POST request and verifies that the values received from the front-end are correct. Once we know that all necessary data has been received,it verifies that the request to our function is valid by calling the reCAPTCHA server. Finally, if everything is correct, it publishes the message to the SNS topic.
export const handler = async (event) => {
    if (!CAPTCHA_KEY || !SNS_ARN) {return SECRET_RETRIEVAL_ERROR;}
    let body = undefined;
    try {body = JSON.parse(event.body);} catch (error) {return JSON_PARSE_ERROR;}
    body = validateInput(body);
    if(!body) {return VERIFY_INPUT_ERROR;}
    let success = false;
    try {success = await verifyRecaptcha(body.token);} catch (error) {return RECAPTCHA_CONNECTION_ERROR;}
    if(!success) {return RECAPTCHA_VERIFY_ERROR;}
    try {await publishMessageToSNS(body.mail, body.subject, body.message);} catch (error) {return SNS_PUBLISH_ERROR;}
    return FORM_SUBMITTED_SUCCESSFULLY;
};
If you want to take a look at the complete Lambda JavaScript code, you can do so in lambda.mjs.
Amazon API Gateway
Amazon API Gateway is a fully managed service provided by AWS that enables developers to create, publish, maintain, and monitor APIs (Application Programming Interface) at any scale. API Gateway allows developers to create HTTP, RESTful and WebSocket APIs, which can handle multiple requests simultaneously and route them to the appropriate backend service, such as AWS Lambda, Amazon EC2, or an HTTP endpoint.
In order to expose our Lambda function to the front-end, we utilize an HTTP API. The default Invoke URL is disabled and replaced with a custom domain. We create the route "/contactForm" and associate it with the Lambda function. We configure CORS to only allow our domain, the POST method, and the content-type header as the only permitted header.
Contact form
HTML
First, I will define the contact form in HTML. This form should include three fields: the sender's email address, the subject of the message, and the message itself. The HTML code is as follows:
<form id="contact" enctype="multipart/form-data" method="post">
    <input type="email" placeholder="[email protected]" name="mail" maxlength="50" aria-label="Email" required>
    <input type="text" placeholder="Your message subject" name="subject" maxlength="100" aria-label="Subject" required>
    <textarea placeholder="Your message content" aria-label="Message" name="message" maxlength="1000" required></textarea>
    <div class="g-recaptcha" data-sitekey="RECAPTCHA_PUBLIC_KEY"></div>
    <input type="submit" value="Send the message">
</form>
This code creates an HTML form with input fields for the user to enter data. The "form" tag has an "id" attribute to identify the form and the input elements have "placeholder" and "maxlength" attributes to display an example message in the field and set a character limit, respectively. There is also an "aria-label" attribute that provides a label to describe the purpose of the input field for screen reader users. Additionally, the "required" attribute indicates that the user must provide a valid value in order to submit the form.
JavaScript
Now that our contact form looks geat, it's time to implement the logic behind handling the form. From the web's JavaScript, we define an event to be triggered when the user submits the form. The first thing we will do within the event is use the preventDefault() function to disable the default form submission and handle the data submission to the backend ourselves, thus avoiding the page from reloading.
We will then retrieve the data from the form. To avoid code injections and unwanted text, we will sanitize the input values with the trim() and replace() functions. With the sanitized strings, we create the formData object and send it to the backend using the JavaScript fetch() function and the POST method.
fetch('https://BACKEND_DOMAIN/API_PATH', {
    method: 'POST',
    body: JSON.stringify(formData),
    headers: {
        'Content-Type': 'application/json'
    }
});
We handle the possible responses that the backend may give us and based on that we apply a class to the form to give the user feedback that it has been successfully sent or if any error has occurred. If you want to take a look at the complete JavaScript code, you can do so in contact-form.js.
Result
Below, I am sharing the contact form resulting from the implementation discussed in this post. I would be delighted if you use it to leave me your comments and share your opinion, if you have any ideas or constructive criticism on how we could improve this implementation. I am very open to receiving suggestions.
Thanks for reading! Catch you in the next one.