Automating CloudFormation Stack deployment from CodeCommit using CodePipeline
Once we have defined our infrastructure as code to be deployed in our AWS account using CloudFormation templates, manually deploying them every time we need to make a change can be a time-consuming and error-prone task. Automating CloudFormation Stack deployment from CodeCommit using CodePipeline can save you time and effort, especially when working with multiple environments and making changes frequently. That's why I'm going to tell you how I have implemented automation to update my stacks.

How to use AWS CodeCommit to store AWS CloudFormation templates
AWS CodeCommit is a fully-managed source control service that makes it easy for companies to host secure and highly scalable private Git repositories. CodeCommit eliminates the need to operate your own source control system. It also eliminates the need to or worry about scaling its infrastructure. You can use CodeCommit to securely store anything from source code to binaries, and it works seamlessly with your existing Git tools.
To use CodeCommit, you need to create a repository and then push your code to it first. You can do this using the AWS CLI, the AWS CodeCommit console, or by using a Git client. In this post, I'm going to use the AWS CodeCommit console to create a repository and push the code to it.

Once we have created the repository and uploaded the YAML files, the next step is to clone the repository to our local computer. The "master" branch of the repository is used to keep the code that is implemented in production. For the changes that we make during the development phases of new infrastructure that will be deployed, we implement them on a separate branch called "dev". Once all the changes are completed on the "dev" branch, we merge it into the "master" branch to deploy the code into production.
To obtain user credentials for our repository, you need to activate them from the IAM console. To clone the repository, we need to copy the HTTPS clone URL from the repository details page and then use the following command:
git clone https://git-codecommit.region.amazonaws.com/v1/repos/RepositoryNameHow to use AWS CodePipeline to automate deployments
AWS CodePipeline is a fully managed continuous delivery service that helps you automate your release pipelines for fast and reliably updated applications and infrastructure. CodePipeline automates the build, test, and deploy phases of your release process every time there is a code change, based on the defined release model. You can use CodePipeline to quickly and reliably deliver features and updates by automatically building, testing, and deploying your code every time there is a code change.
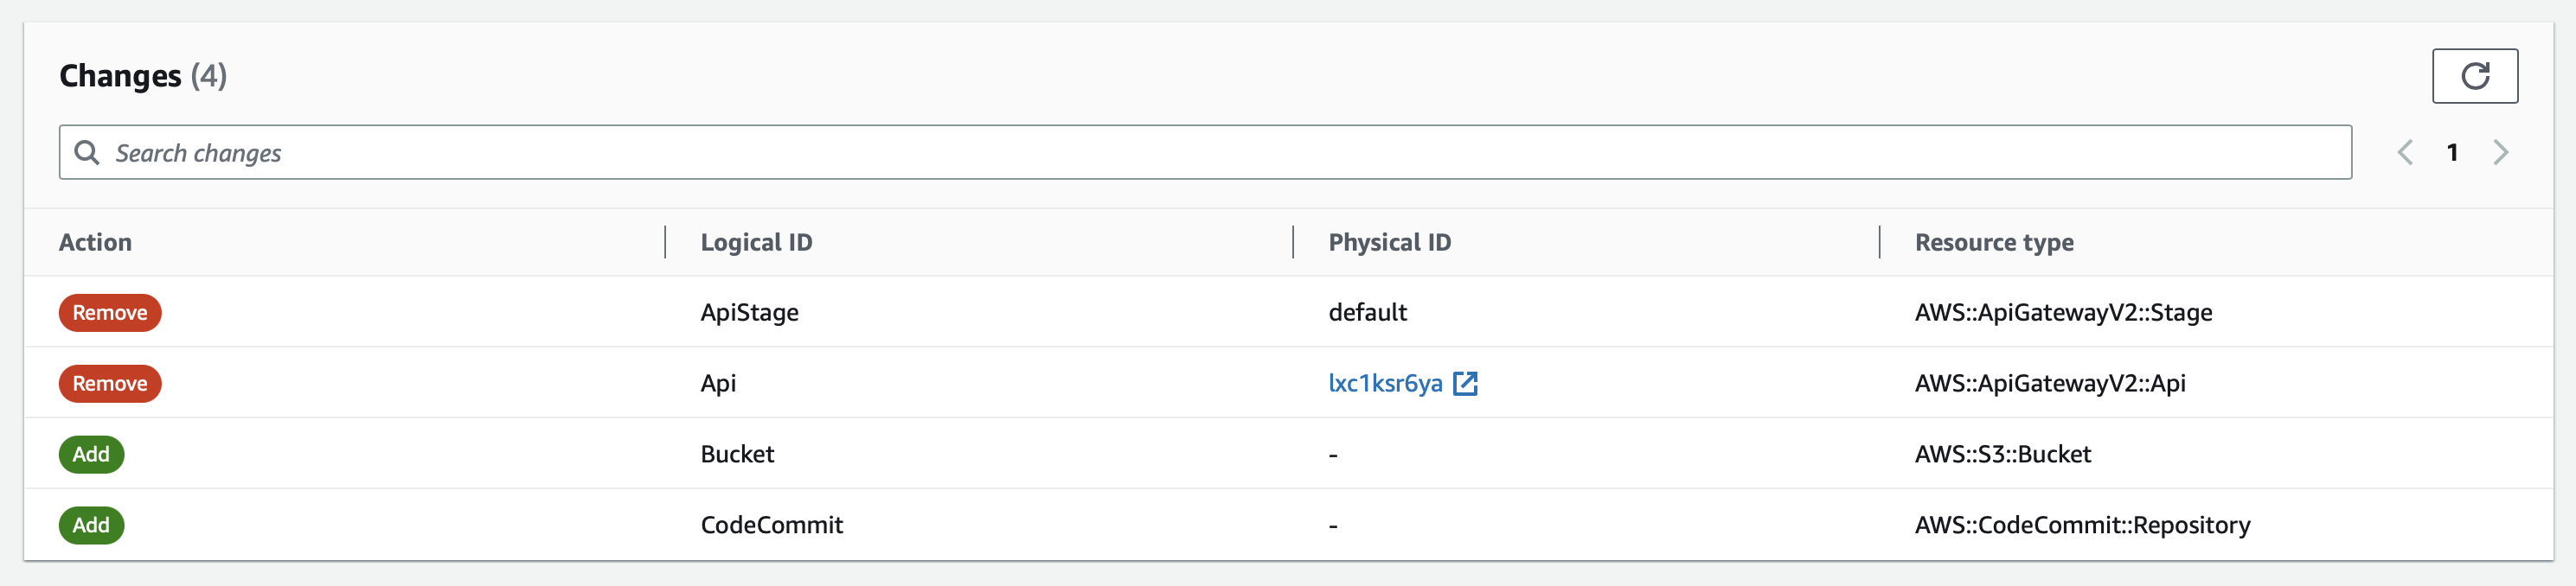
To automate this deployment, two different pipelines have been implemented. The first one takes the dev branch of the repository as the source, and every time a new commit is made to this branch, the pipeline executes a deployment stage with CloudFormation, which generates a new Change Set for the Stack. A Change Set is a set of proposed changes to an AWS CloudFormation stack. It allows you to preview changes to your stack before you apply them, and it provides a way to modify the resources in your stack by creating, updating, or deleting them. The Change Set lists all of the changes that will be made and allows you to review them before you apply them to your stack.
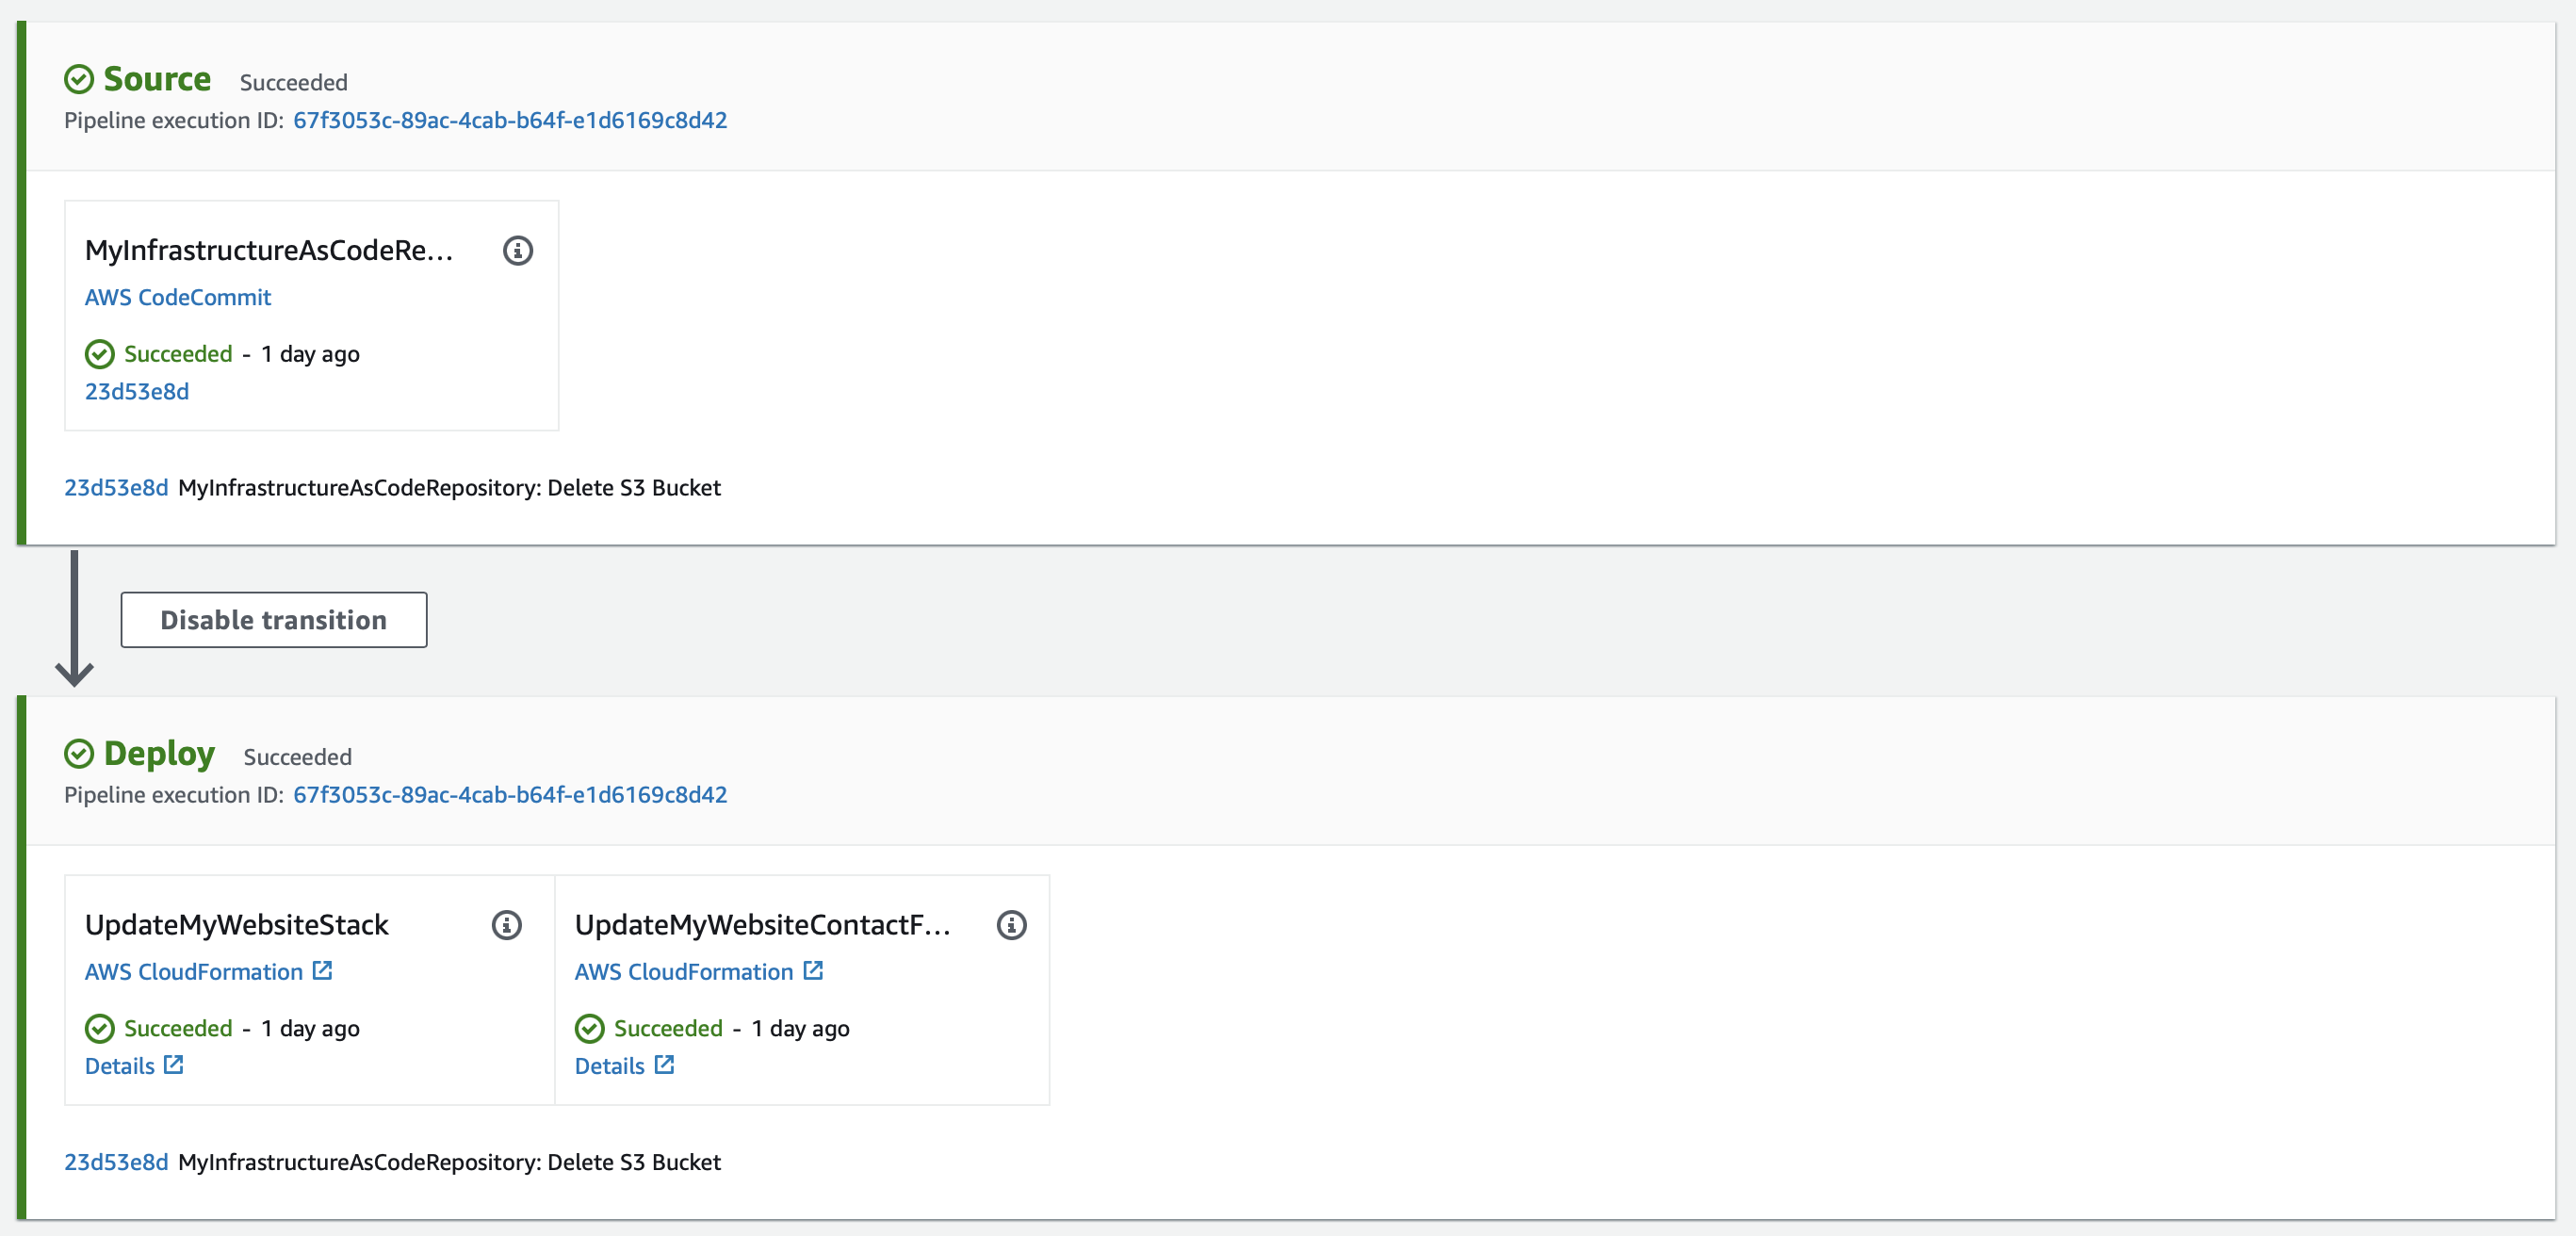
The second one takes the master branch of the repository as the source, and every time a new commit is made to this branch, the pipeline executes a deployment stage with CloudFormation, which updates the Stack.
To make these pipelines work, it is necessary to create two IAM roles. During the pipeline creation process, AWS can create a new role with sufficient permissions to function on your behalf, which is assumed by AWS CodePipeline. For the deployment stage, it will be necessary to specify the ARN of a role for the AWS CloudFormation service to assume. In my case, the role was created with administrator permissions so that it can deploy any infrastructure as code.
Removing artifacts from S3 using Lifecycle rules
After creating a pipeline, AWS CodePipeline stores the artifacts in an S3 bucket. These artifacts are the files that are generated during the pipeline execution. By default, these artifacts are stored in the S3 bucket for 90 days. To avoid incurring unnecessary costs, you need to remove these artifacts after a certain period of time. To do this, we can use the S3 Lifecycle rules. The following rule will remove all the artifacts from the S3 bucket after 1 day.

Pipeline notification rules
AWS Pipeline supports notification rules to help you stay informed about the status of your pipelines and take appropriate actions based on that status. Notification rules are configured using Amazon CloudWatch Events and can be used to trigger notifications through SNS and Slack. In our use case, we want to receive a notification when a Change Set or Stack deployment fails. We will create a new SNS topic to subscribe our email address and set the SNS topic ARN as the target of the notification rule.
Conclusion
In today's fast-paced world, speed and agility are essential to keep up with the ever-evolving technological landscape. By automating CloudFormation Stack deployment from CodeCommit using CodePipeline can significantly streamline the deployment process for infrastructure as code. AWS provides useful tools, such as Amazon S3 Lifecycle rules and Pipeline notification rules, to further optimize the deployment process. We can not only save time and effort, but also reduce the risk of human error, increase efficiency, and improve the overall quality of our infrastructure. With this automation, we can focus on developing and innovating instead of worrying about manual deployment processes.
Thanks for reading! Catch you in the next one.